|
In today’s world, we all sit for too many hours each day. We drive instead of walking. We take the escalator instead of climbing the stairs. As a result, our posture suffers—and our necks get tight because we spend hours looking down at our smart phones. (What's so "smart" about that?) We forget to breathe because we are constantly multi-tasking. And as a result, we suffer from a multiplicity of ailments, especially chronic shoulder tension and back pain. We are more "connected" than we have ever been, yet we are increasingly disconnected from ourselves and what we need to do to truly live vital, healthy, and inspired lives. So what can you do? The answer is MOVE. But more specifically, strengthen your core, which can help stabilize your spine, improving its fluidity and flexibility. The following simple exercises are a powerful antidote to all that sitting. They are a potent time-saving combination of Pilates moves and yoga poses that will help you stop pain in its tracks, reduce stress (which can also contribute to back pain), and improve your spinal alignment. This series also stretches and strengthens the core and back. So, want to feel stronger and longer, leaner and meaner, more fluid and flexible in just a few minutes? Grab your mat, and let’s get started! Pre-Roll Up: 6-8 Repetitions 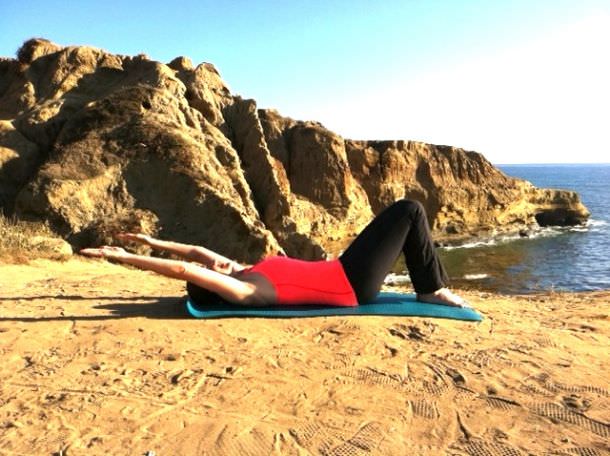 Start on your back with your knees bent, feet firmly planted into the floor, six inches away from the glutes. Extend your arms long overhead, six inches off of the floor behind you. As you inhale, squeeze the knees and together, and reach powerfully through your fingertips, stretching away from your feet as much as possible to lengthen your arms. Start on your back with your knees bent, feet firmly planted into the floor, six inches away from the glutes. Extend your arms long overhead, six inches off of the floor behind you. As you inhale, squeeze the knees and together, and reach powerfully through your fingertips, stretching away from your feet as much as possible to lengthen your arms.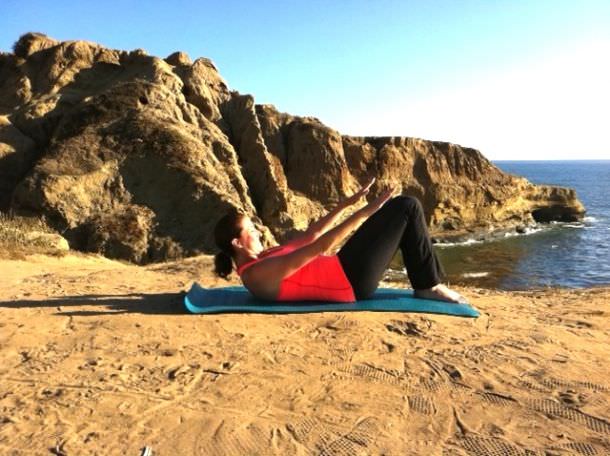 Exhale and reach the fingertips towards the knees as you peel the body up off of the floor, one vertebra at a time, without moving the feet, until you lift all the way up and come to a tall sitting position with the arms outstretched slightly higher than shoulder height. Inhale here at the top of the movement, and as you exhale, start to slowly roll back as though you are massaging one vertebra into the mat at a time until you return to the starting position to complete one rep. Exhale and reach the fingertips towards the knees as you peel the body up off of the floor, one vertebra at a time, without moving the feet, until you lift all the way up and come to a tall sitting position with the arms outstretched slightly higher than shoulder height. Inhale here at the top of the movement, and as you exhale, start to slowly roll back as though you are massaging one vertebra into the mat at a time until you return to the starting position to complete one rep.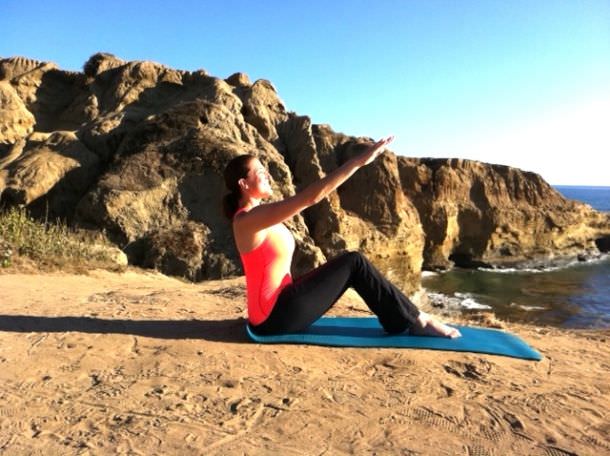 TIP: If you have trouble coming all the way up without moving your feet or you "get stuck," grab your thighs to help you to come up the rest of the way. When you do this, make sure that your shoulders don’t rise up, and draw your lats down to keep the shoulders anchored. If this still doesn’t help you, come up as high as you can, and take heart that you are working very effectively, strengthening the deep abdominal muscles, making it possible for you to lift up with less effort each time you practice the movement. Remember, practice makes perfect, and one day you’ll be able to curl all the way off the mat! TIP: If you have trouble coming all the way up without moving your feet or you "get stuck," grab your thighs to help you to come up the rest of the way. When you do this, make sure that your shoulders don’t rise up, and draw your lats down to keep the shoulders anchored. If this still doesn’t help you, come up as high as you can, and take heart that you are working very effectively, strengthening the deep abdominal muscles, making it possible for you to lift up with less effort each time you practice the movement. Remember, practice makes perfect, and one day you’ll be able to curl all the way off the mat!Why It Works: The roll-up is a powerful abdominal strengthener that also improves spinal flexibility, literally creating space between the vertebral discs and often resulting in looking and feeling taller. Plank / Leg Lift 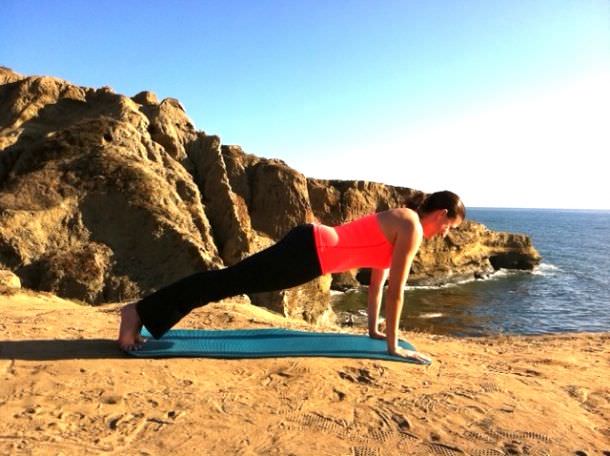 Start on hands and knees with your hands directly underneath your shoulders. Curl the toes under and stretch the legs back straight one at a time, coming into a plank position with the heels together and the toes slightly flared apart. Make sure that your body is in one long line, from the crown of the head to the heels. Pull the navel into the spine, slightly tuck your pubic bone underneath you, lengthening the lower back, squeeze the inner thighs and glutes together and push the floor away with your hands. If this is challenging enough for you, hold plank for 30-60 seconds. If you can do more, add the challenge listed below. Start on hands and knees with your hands directly underneath your shoulders. Curl the toes under and stretch the legs back straight one at a time, coming into a plank position with the heels together and the toes slightly flared apart. Make sure that your body is in one long line, from the crown of the head to the heels. Pull the navel into the spine, slightly tuck your pubic bone underneath you, lengthening the lower back, squeeze the inner thighs and glutes together and push the floor away with your hands. If this is challenging enough for you, hold plank for 30-60 seconds. If you can do more, add the challenge listed below.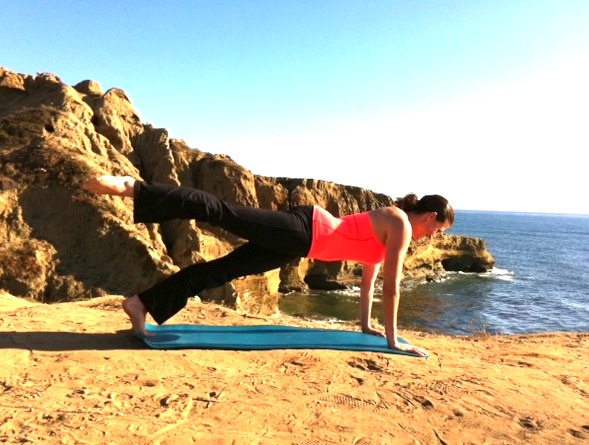 Add Challenge (Optional): Keeping the arms strong, maintaining the hips in alignment, inhale as you lift the right leg straight up with a pointed foot like a controlled kick, and lower it, on the exhale barely grazing the floor, and then kick it up right away again, completing eight kicks total, breathing in tandem with the lifting and lowering of the legs. Keeping the arms strong and the abdominals engaged, switch immediately to the left side and repeat eight kicks. Repeat both sides one more time. After completing both sides, rest in child’s pose to gently stretch the spine. Add Challenge (Optional): Keeping the arms strong, maintaining the hips in alignment, inhale as you lift the right leg straight up with a pointed foot like a controlled kick, and lower it, on the exhale barely grazing the floor, and then kick it up right away again, completing eight kicks total, breathing in tandem with the lifting and lowering of the legs. Keeping the arms strong and the abdominals engaged, switch immediately to the left side and repeat eight kicks. Repeat both sides one more time. After completing both sides, rest in child’s pose to gently stretch the spine.Why It Works: This exercise not only strengthens your core and back muscles, it's a real total-body exercise. Another bonus here is the lengthening of the lower back that occurs when you perform the plank in the correct alignment, with the pubic bone drawn slightly under, which provides a kind of gentle traction to the low back and sacrum, and this usually provides a feeling of great relief to those suffering from chronic low back pain. Low Lunge Series  Start on your hands and knees and step the right foot through your hands, toes in line with your fingers, coming into a low lunge with the left leg bent behind you, toes tucked under. Breathe naturally, but deeply. Engage the abdominals and lift your torso up to a tall vertical position, with the head held high and shoulders down and back. Place the hands on top of your right knee and start to ease your hips down towards the floor as you deepen your breath to facilitate the stretch you should be starting to feel in your left hip flexor, and perhaps also in your right hamstring. Hold for 2-3 breaths. Start on your hands and knees and step the right foot through your hands, toes in line with your fingers, coming into a low lunge with the left leg bent behind you, toes tucked under. Breathe naturally, but deeply. Engage the abdominals and lift your torso up to a tall vertical position, with the head held high and shoulders down and back. Place the hands on top of your right knee and start to ease your hips down towards the floor as you deepen your breath to facilitate the stretch you should be starting to feel in your left hip flexor, and perhaps also in your right hamstring. Hold for 2-3 breaths. Deepen the Stretch (Optional): If you want to increase the range of motion in the stretch, gently tuck the pubic bone underneath you. Now extend your left arm straight out in front of you, and stabilize your balance by reinforcing the navel-to-spine connection, pulling your abdominals in and lifting the crown of the head even taller toward the sky. Lift the left arm up to the ear and, with great control, gently lift and lengthen your spine into a slight backbend, taking your gaze up to the sky and rooting your legs and feet strongly into the floor to maintain your balance and control. Try to hold the backbend for 2-3 breaths. Deepen the Stretch (Optional): If you want to increase the range of motion in the stretch, gently tuck the pubic bone underneath you. Now extend your left arm straight out in front of you, and stabilize your balance by reinforcing the navel-to-spine connection, pulling your abdominals in and lifting the crown of the head even taller toward the sky. Lift the left arm up to the ear and, with great control, gently lift and lengthen your spine into a slight backbend, taking your gaze up to the sky and rooting your legs and feet strongly into the floor to maintain your balance and control. Try to hold the backbend for 2-3 breaths.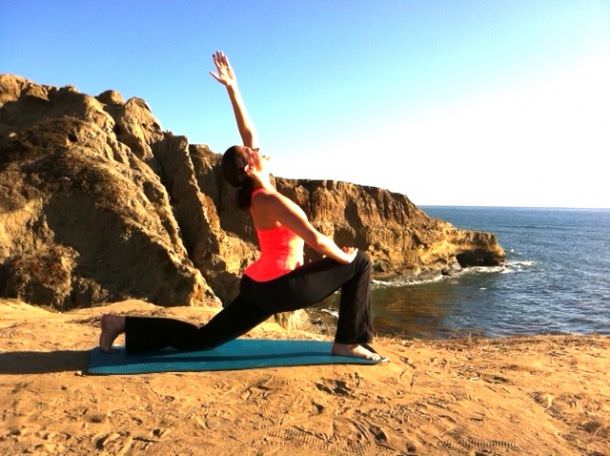 Next, take your outstretched left arm and reach toward the sky, arcing over towards the right side of the body, thereby increasing the stretch in the left hip flexor even more. Draw the shoulders down away from the ears and continue to pull the abdominals in to maintain your balance. Hold this stretch for 2-3 breaths, and try to let your body give into gravity and relax, which only helps to deepen the stretch. Next, take your outstretched left arm and reach toward the sky, arcing over towards the right side of the body, thereby increasing the stretch in the left hip flexor even more. Draw the shoulders down away from the ears and continue to pull the abdominals in to maintain your balance. Hold this stretch for 2-3 breaths, and try to let your body give into gravity and relax, which only helps to deepen the stretch.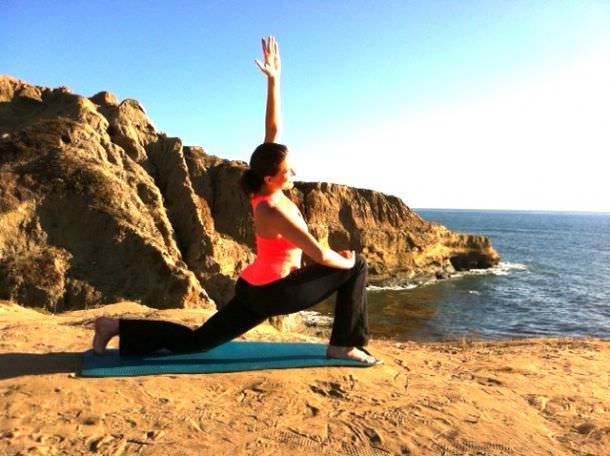 Return to center and then gently step the right foot back, and step the left foot front, repeating the entire series on the other side. Tip: Because this is a very deep stretch for the pelvis, it’s wise to move slower at this point so that your muscles can adjust out of the stretch and come back into normal range and function. Return to center and then gently step the right foot back, and step the left foot front, repeating the entire series on the other side. Tip: Because this is a very deep stretch for the pelvis, it’s wise to move slower at this point so that your muscles can adjust out of the stretch and come back into normal range and function.Why It Works: This series of exercises improves posture and abdominal control, while it stretches the quads, the deep muscles of the pelvis, including the hip flexor, as well as the abs, sides of the body and the muscles surrounding the spine. This stretch (and the next one) also targets a very important muscle in healing back pain: the psoas, which often works overtime to compensate for weak abdominal muscles. When it gets tight, it can compress the lumbar discs, leading to lower back pain. Forward Bend 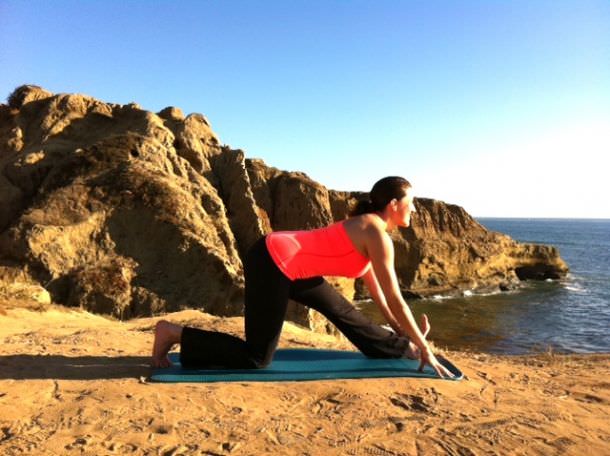 After completing the low lunge series, a nice, smooth transition is available to you with this exercise; simply place your hands down on either side of your feet and shift your hips back so that they form a right angle with the floor. Extend your left leg straight out in line with your right shoulder, and flex the foot; place your hands on either side of your extended leg. After completing the low lunge series, a nice, smooth transition is available to you with this exercise; simply place your hands down on either side of your feet and shift your hips back so that they form a right angle with the floor. Extend your left leg straight out in line with your right shoulder, and flex the foot; place your hands on either side of your extended leg.Tip: If this stretch already feels inaccessible, use yoga blocks as an added support underneath your hands to lift your torso higher up and lessen the intensity of the stretch. Inhale deeply and as you exhale, lengthen your spine into a flat position with your neck long and your arms energized to support the pose. Hold this stretch for 2-3 breaths, and breathe deeply into the hamstring muscle of your extended leg to facilitate the release. 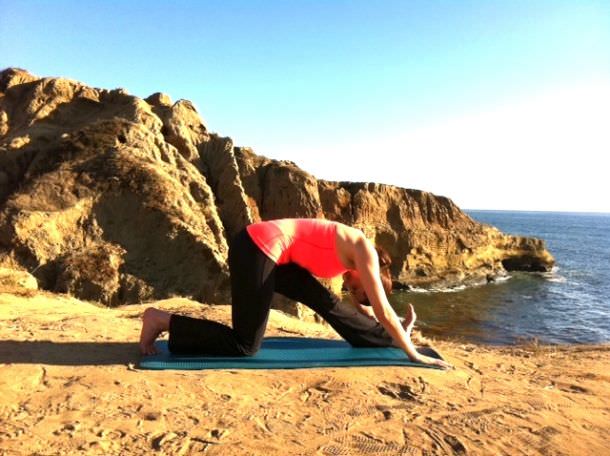 After your third breath in this extended position, drop your head down and round the spine forward over the leg, likely increasing the stretch in your hamstring. After your third breath in this extended position, drop your head down and round the spine forward over the leg, likely increasing the stretch in your hamstring.Why It Works: This exercise stretches the hamstring and the muscles surrounding the spine. Tight hamstrings are a major culprit in chronic back pain, and this exercise helps to liberate habitual holding patterns that arise from poor posture by going in directly and targeting the hamstrings, essentially sending the message that they can relax and lengthen away from the lower back, hence creating more space in the lower back for increased circulation and fluidity of movement. Crescent 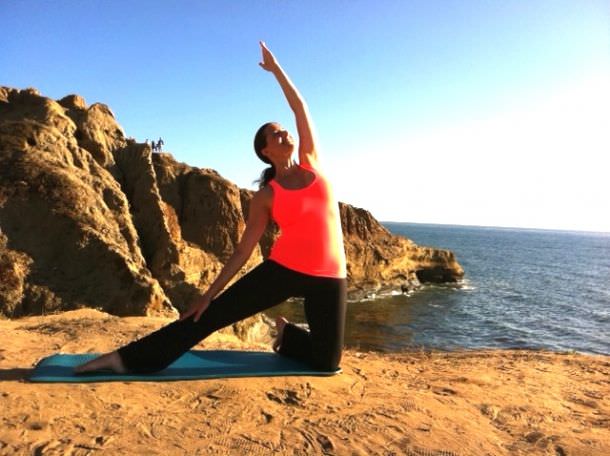 Bring your right knee to the far right side of your mat in a parallel position, tucking your toes under, and lengthen your left leg straight out to the side of the body, externally rotating the leg in the hip socket, with the knee cap facing the ceiling (to the best of your ability) pointing the foot down into the mat. Lift your torso up tall, deeply engaging your abdominals for balance and stability place your left hand on your left leg and lift your right arm up to the side of the right ear. Reach your right hand up with energy toward the ceiling, and draw the right shoulder down. Bring your right knee to the far right side of your mat in a parallel position, tucking your toes under, and lengthen your left leg straight out to the side of the body, externally rotating the leg in the hip socket, with the knee cap facing the ceiling (to the best of your ability) pointing the foot down into the mat. Lift your torso up tall, deeply engaging your abdominals for balance and stability place your left hand on your left leg and lift your right arm up to the side of the right ear. Reach your right hand up with energy toward the ceiling, and draw the right shoulder down.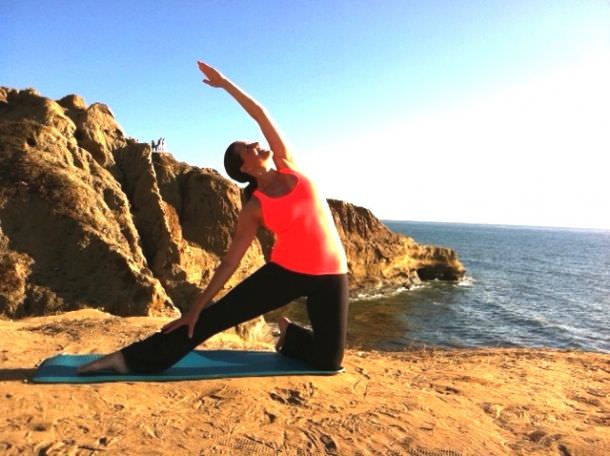 Continue to breathe deeply as you slide your left hand farther down your leg and reach your right arm even higher, arcing your body over your left leg, fully engaging your abdominals and drawing your ribs together to maintain correct form in your torso as you deepen the side stretch. Hold the side stretch position for 2-3 breaths and do your best to increase the stretch, sliding the left hand lower down on the leg and leaning even farther over the left leg. After completing 3 breaths, lift back up to the starting position by reaching your right hand up with energy and using your abdominals and back muscles, and repeat the sequence on the other side. Continue to breathe deeply as you slide your left hand farther down your leg and reach your right arm even higher, arcing your body over your left leg, fully engaging your abdominals and drawing your ribs together to maintain correct form in your torso as you deepen the side stretch. Hold the side stretch position for 2-3 breaths and do your best to increase the stretch, sliding the left hand lower down on the leg and leaning even farther over the left leg. After completing 3 breaths, lift back up to the starting position by reaching your right hand up with energy and using your abdominals and back muscles, and repeat the sequence on the other side.Tip: It is quite common when you first start this exercise for the pointed foot to cramp. If the left foot does cramp, release out of the posture temporarily until the cramp passes and then resume. Why It Works: This posture helps to deeply stretch all of the muscles of the side body, literally from the upper thigh to the fingertips, including the psoas and muscles in the front of the pelvis and the low back. According to the wisdom of yoga and Joseph Pilates (the man who created The Pilates Method), you are only as young as your spine is. “A flexible spine is a flexible mind, and it is the mind which shapes the body,” Pilates said. By doing these simple movements a few times each week, you will access new levels of energy and ease to perform everyday tasks without pain and create a deeper, more complete feeling of vitality that remains with you days after your workout! 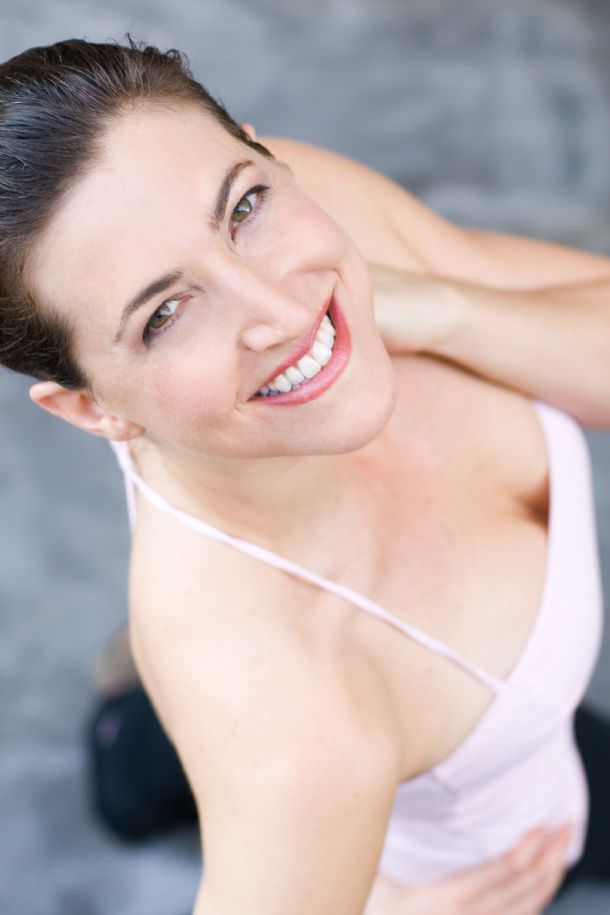 About the Author About the AuthorAn integrated wellness, fitness and lifestyle expert, Jennifer Kries is an internationally renowned mind-body-spirit innovator. The first to bring Pilates, and "The Method," the groundbreaking synthesis of Pilates, yoga and dance to a mass audience, her award-winning videos, DVDs, and TV show revolutionized the fitness community and started the explosive wave of enthusiasm for Pilates and mind-body exercise. She is the creator and producer of several original DVD Series, including her all-new Waking Energy Teacher Training, The Hot Body Cool Mind DVD Series, and The Pilates Method Master Trainer Series. Jennifer has inspired countless readers, practitioners, instructors, and viewers alike to embrace her all-encompassing philosophy of movement, art, health, life and energy. Her attention to detail, superb teaching style, artistry, and knowledge of Eastern healing techniques makes her one of the most sought after mind-body teachers in the world today. Learn more at www.JenniferKries.com. Photos by Charles Benefiel |
Popular Entries
Related Entries
More From SparkPeople
|
.jpg)

.jpg)

