|
Strong is the new skinny, people. In addition to reducing blood pressure, increasing the length of time you can hold your toddler at the grocery store and decreasing your risk of osteoporosis, strength training as you age also reduces your risk for death: In one study, people 65 and over were 46 percent less likely to die if they strength trained at least twice a week compared to those who did not. It's no wonder then that, in addition to 150 minutes per week of aerobic activity, the Centers for Disease Control and Prevention recommends two muscle-strengthening sessions per week. For most novice exercisers, that means stepping up their workouts from simple walks and cardio sessions to include a trip to their Back up though. Gym machines are great for targeting specific muscles and serving as a soft introduction to strength training for beginners. But the gym and those machines aren't the only way to work your muscles. You can get all the benefits of your favorite machines—plus extra muscle-building benefits and reduced injury risk—with little or no equipment. So whether you don’t have time to get to the gym, find the moving parts confusing or intimidating, or want to avoid crowds and lines, rest assured that you can get an even better workout without big pieces of equipment. Nine machines stand out as some of the most common and popular in gyms across America: Each one can be replaced—and improved upon—with these exercise options that require little or no equipment. The Machine: Leg ExtensionPeople love the leg burn they can get from sitting and pumping the knees forward, but the machine only works your quadriceps, or the muscle at the front of your thighs. Because you’re seated, your You can actually still work the quads while training your butt, hamstrings and core simultaneously with a bodyweight or weighted split squat, says Craig Ballantyne, founder of Turbulence Training. "[The split squat] trains multiple muscle groups at once, while working the quadriceps harder than the leg extension machine," he says. Plus, the move comes without some of the risks of the leg extension, which "puts extra stress on the ACL and patella tendon, and could cause overuse injury over time." The split squat is very similar to a lunge, of course, but it’s a little simpler. Focus on squeezing the muscles in your leg throughout so that you feel the contraction, even without adding additional weight. The Equipment-Free Exercise: Split Squat 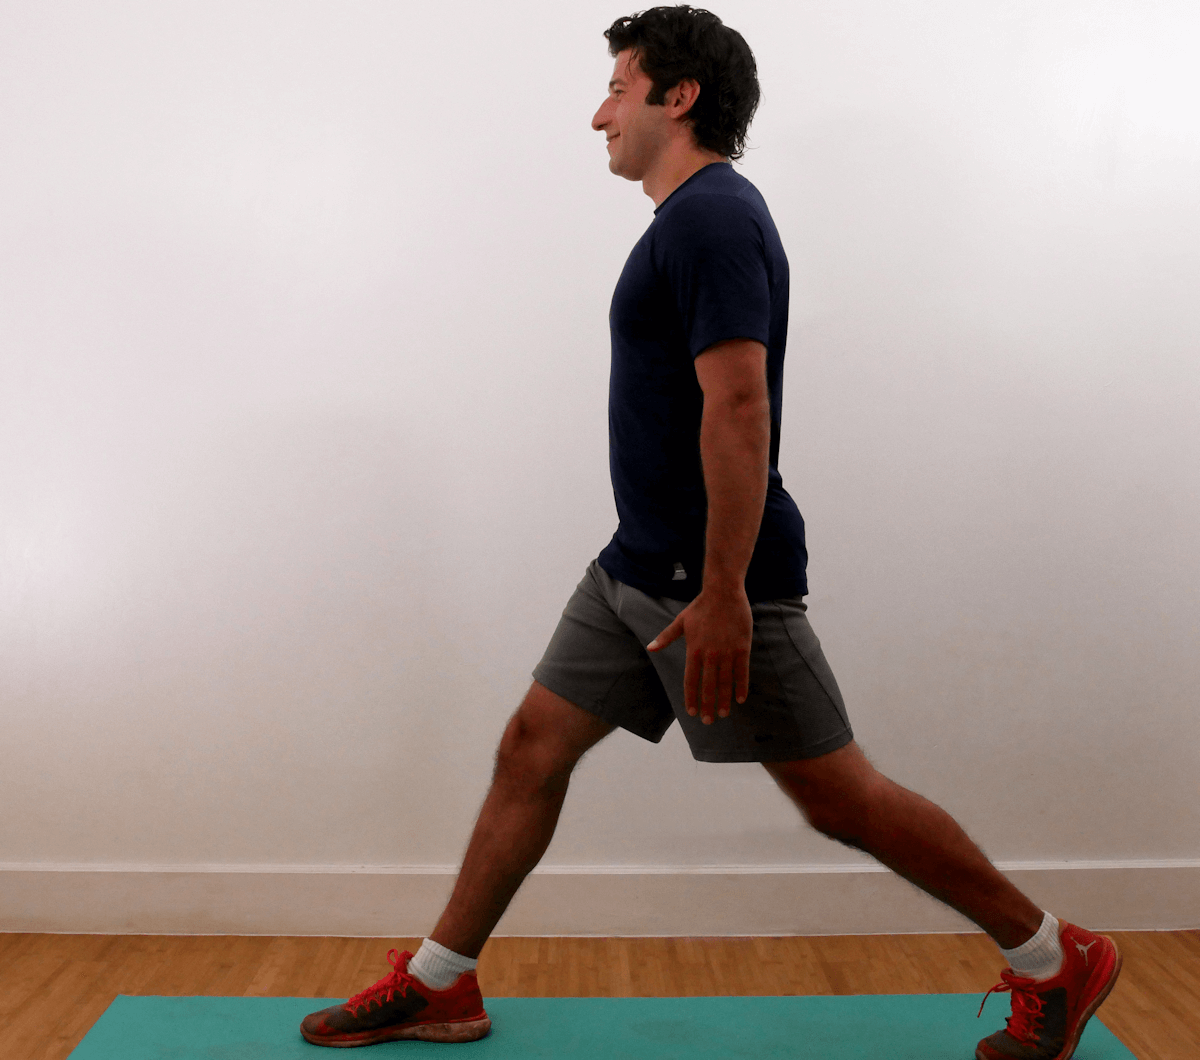 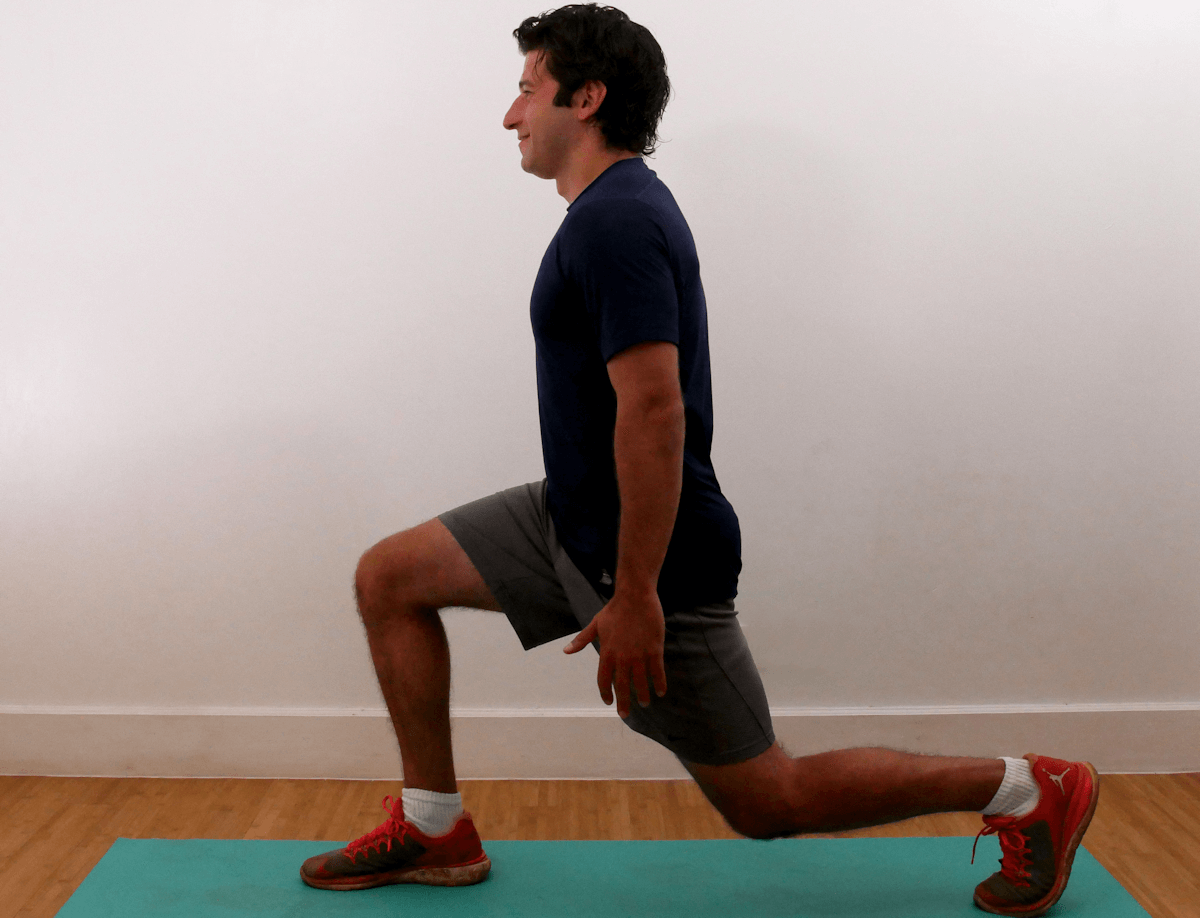 To do the split squat, stand with your feet together, about shoulder-width apart. Take a large lunge step forward with your right foot so that your feet are about three feet apart, with your feet still parallel. Bend your knees to descend until your To add resistance, simply add weight to your hands at your sides—whether it’s a pair of dumbbells or a few heavy cans to start The Machine: Hip Adduction and AbductionIf you’re using this machine, you probably want thinner, firmer thighs. But unlike most machines on this list—which may have their flaws—this one just doesn’t do what you are hoping it will. "You’re in hip flexion [with your hips bent up so you have a lap], and that’s not how hip abduction and adduction work," says Shawn For plain old hip abduction (lifting the leg away from the body) and adduction (bringing the leg back toward the "Research has shown that the adductor in particular is really The Equipment-Free Exercise: Bodyweight Lunge 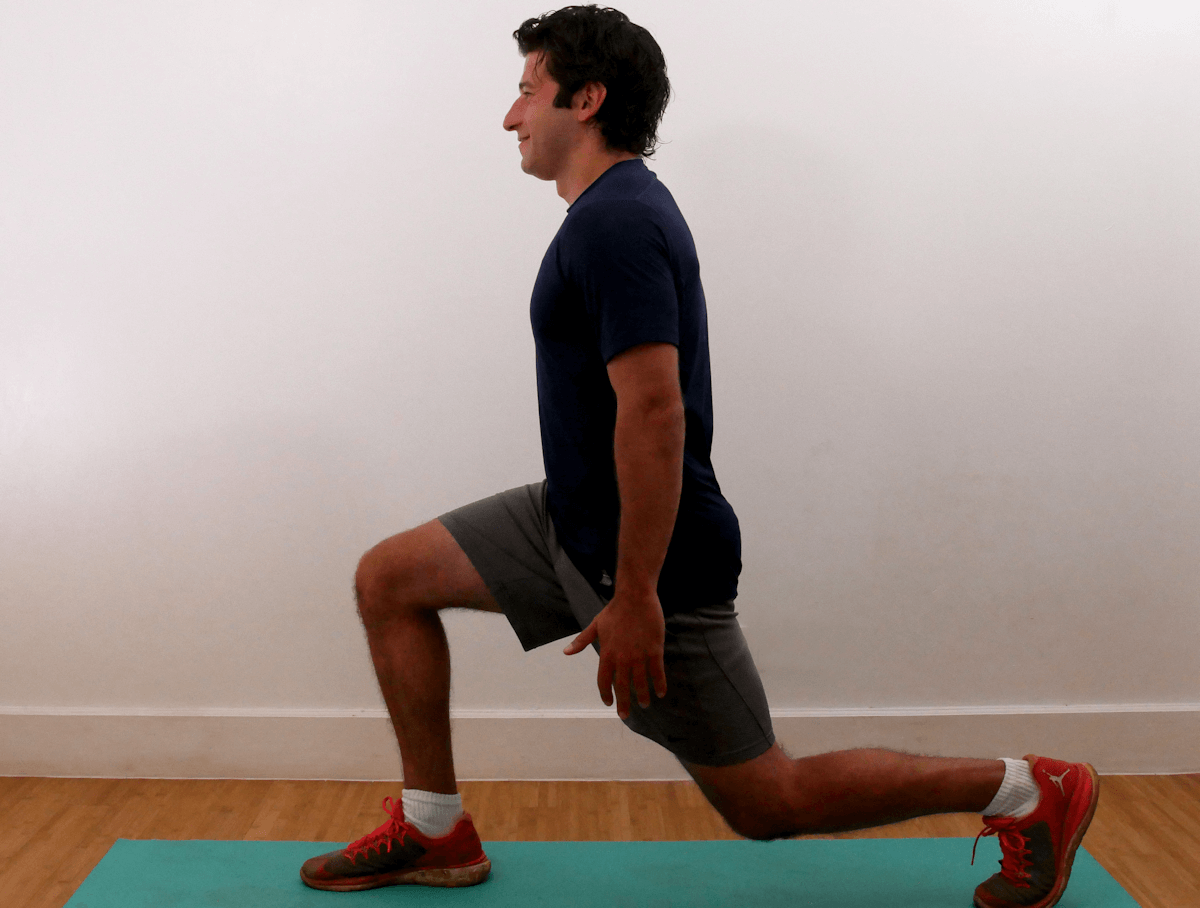 Stand with your feet shoulder-width apart. Take a large lunge step forward with your right leg, descending as you step until your knees both form 90-degree angles. Press through your right foot to stand back up. Once you finish all your reps on the right side, do an equal number with your left foot forward. Try for five reps on each leg to start, working from two sets up to four sets. Minimal-Equipment Move: Resistance Band Lateral Walk 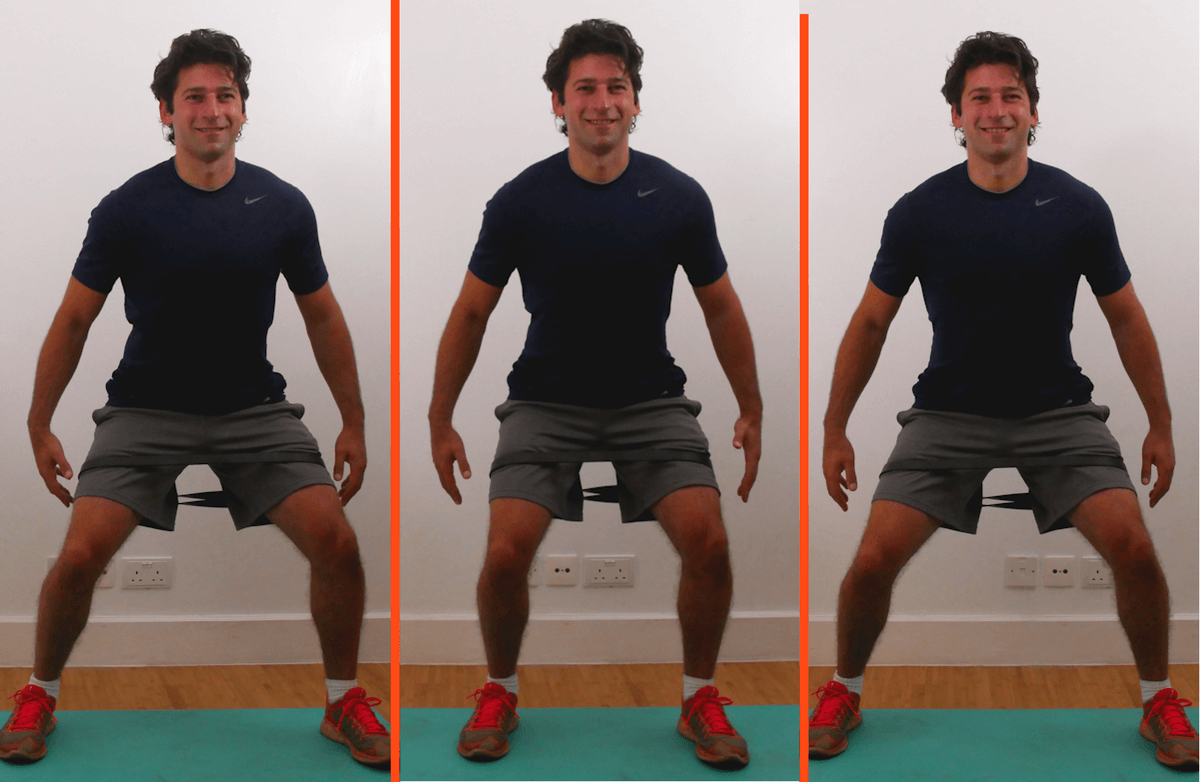 Wrap the resistance band around your legs just above the knees—the higher on your thighs you go, the easier the move will be. Bend your knees slightly and step out The Machine: Sit-Up MachineThe motivation for hopping on this machine is no secret: You want that trim, muscular tummy, and adding weight to a traditional sit-up should make it more effective, right? Not exactly. Taking your crunch or sit-up to the next level doesn’t have to involve pulling on your neck or pulling your hips and lower back into a rounded, flexed position over and over. Mike Wunsch, a trainer and program design specialist, The Equipment-Free Exercise: Seated Russian Twist 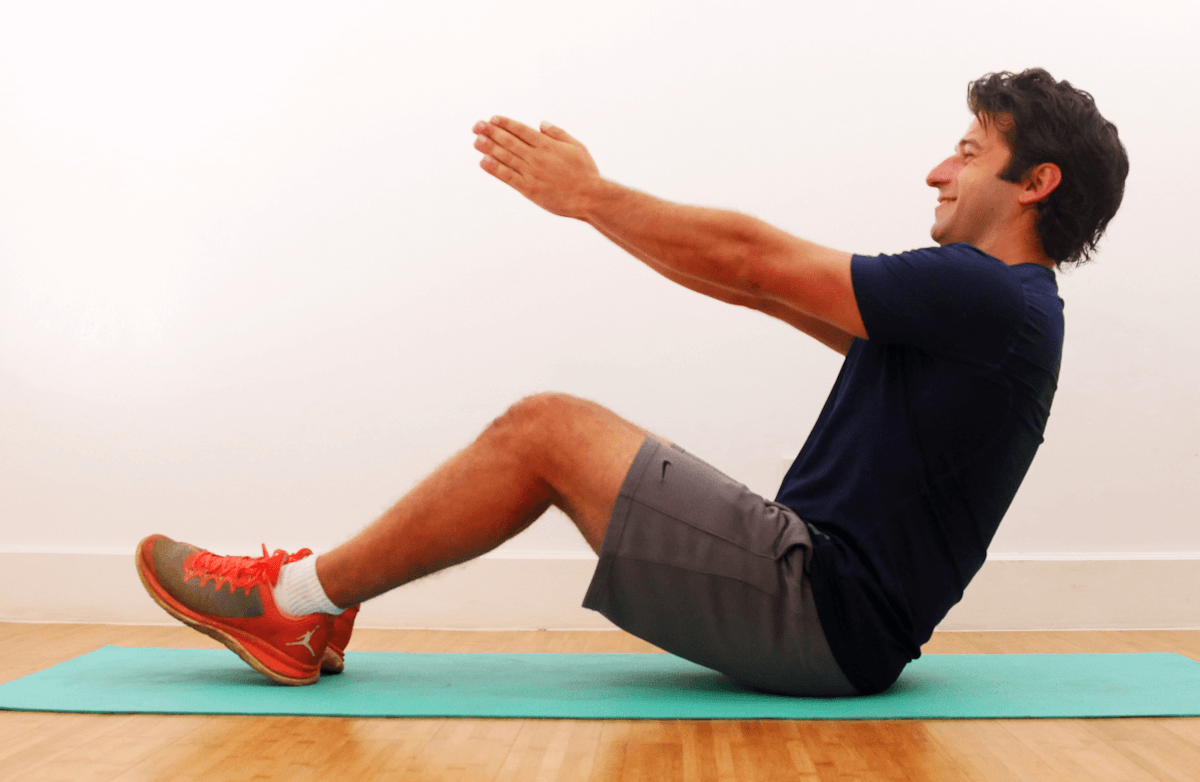 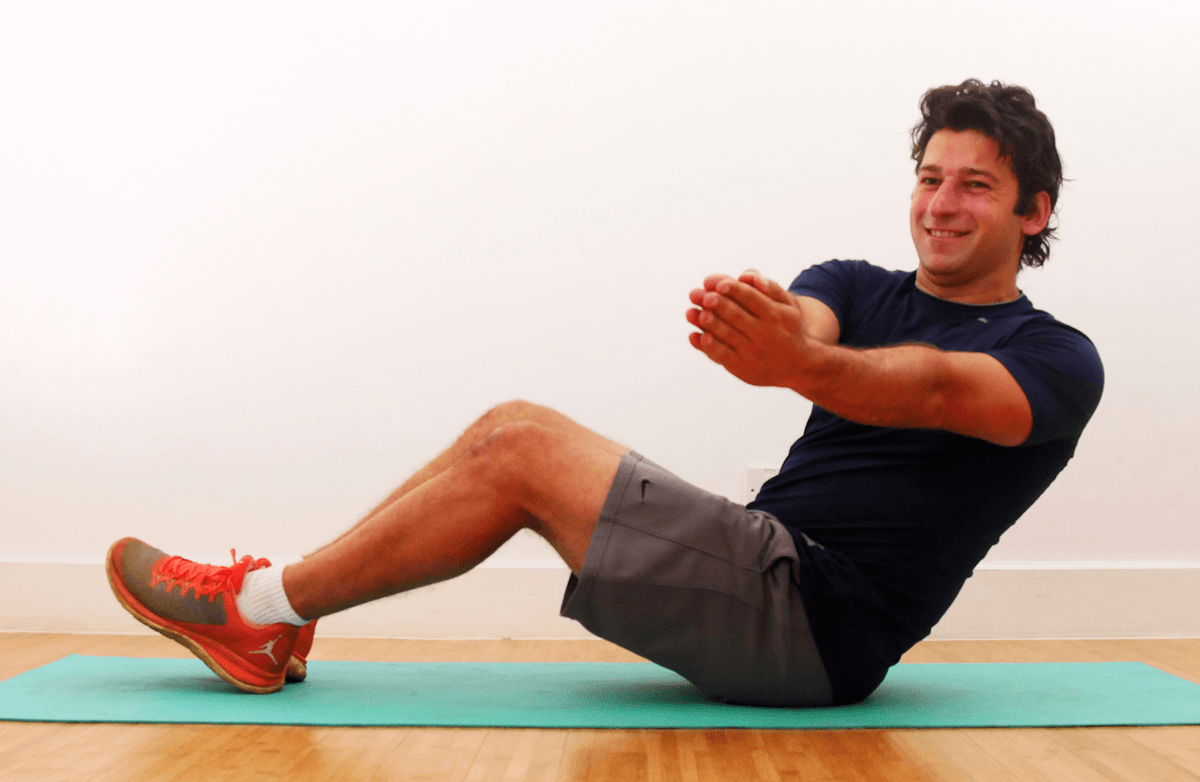 Sit on the floor with your heels on the ground. Your torso should be at a 45-degree angle from the ground, and should be in a straight line from your buttocks to your head. Place your arms in front of you as a guide. From this position, twist to the left, rotating your whole torso, not just your arms, until your hands point out to nine o’clock. To use your hands as a guide, your shoulders and chest should remain in the same position relative to your hands as you twist. Twist back to start, and then go to the right, twisting until your shoulders, chest and hands point toward three o’clock. That’s one repetition. Start with 10. If this is too easy, try lifting one foot slightly off the floor. Once that’s too easy, The Machine: Lying Leg CurlThe lying leg curl machine is a dying breed in the gym—it was once a great way to target the hamstrings, and was used by many The seated version, which is now seen in many gyms, is not as good, says Ballantyne, as they don’t offer significant tension on the The Equipment-Free Exercise: Single-Leg Hip Extension with Elevated Foot 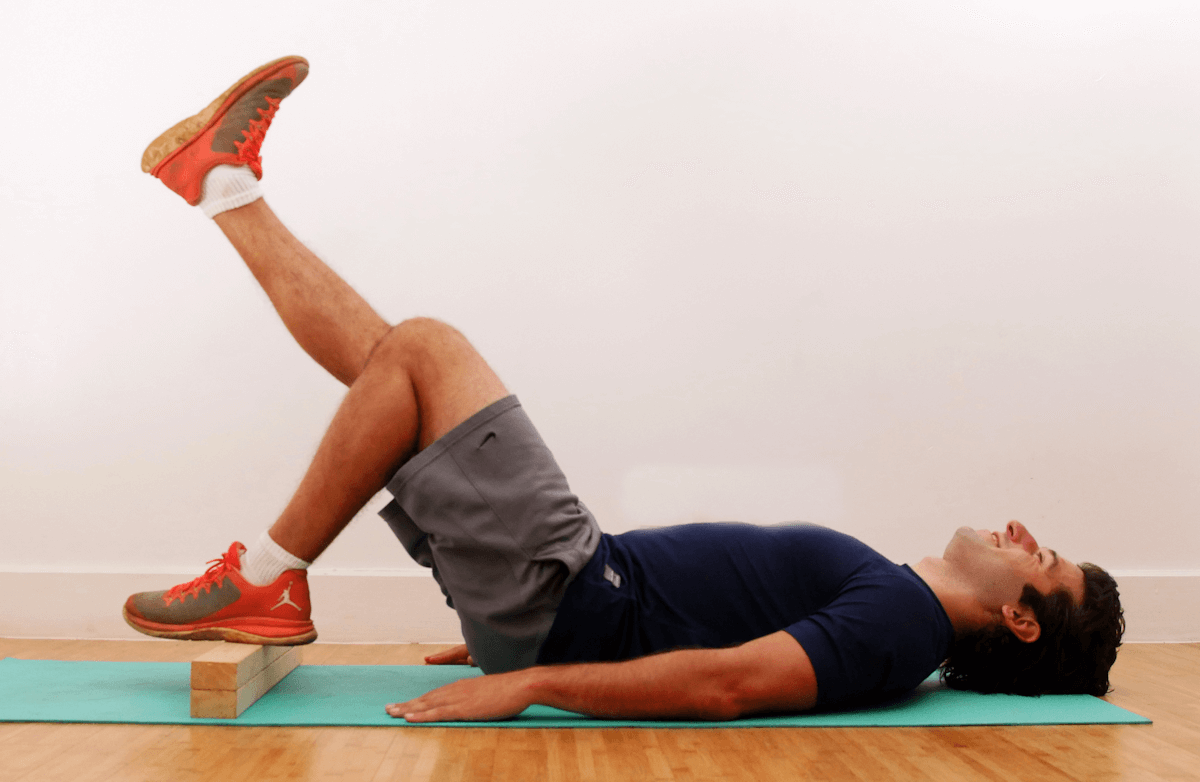  Lie face up on a mat with your knees bent and feet flat on a six-inch step or box. Place your arms at your sides, palms up. Lift your lower right leg off the floor so that it’s straight, with your thighs still parallel to each other. Keep this leg straight (and your thighs parallel) as you press up. Keeping your other foot flat on the box, squeeze your glutes to raise your hips off the floor until your body forms a straight line from your knees to your shoulders. Pause for a second at the top of the exercise, then slowly return to the start position. Do four reps on this side, then switch legs and repeat on the other side. Minimal-Equipment Move: Stability Ball Hip Extension and Leg Curl 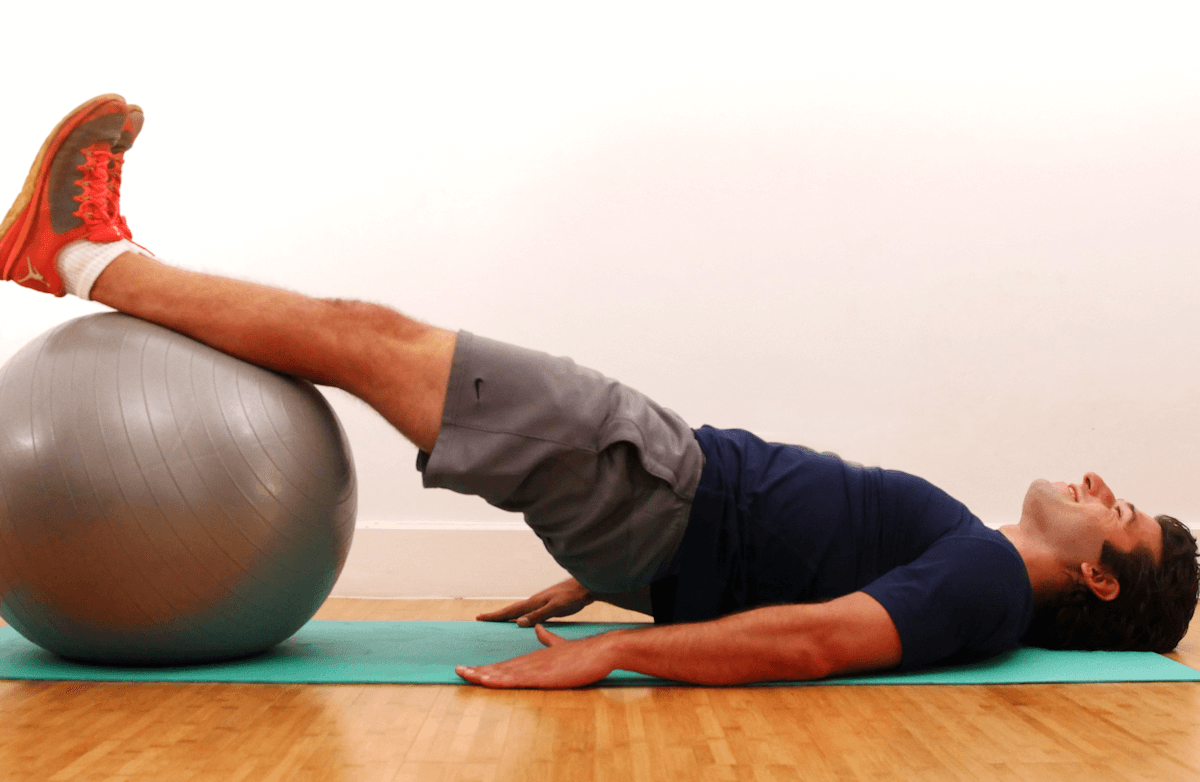 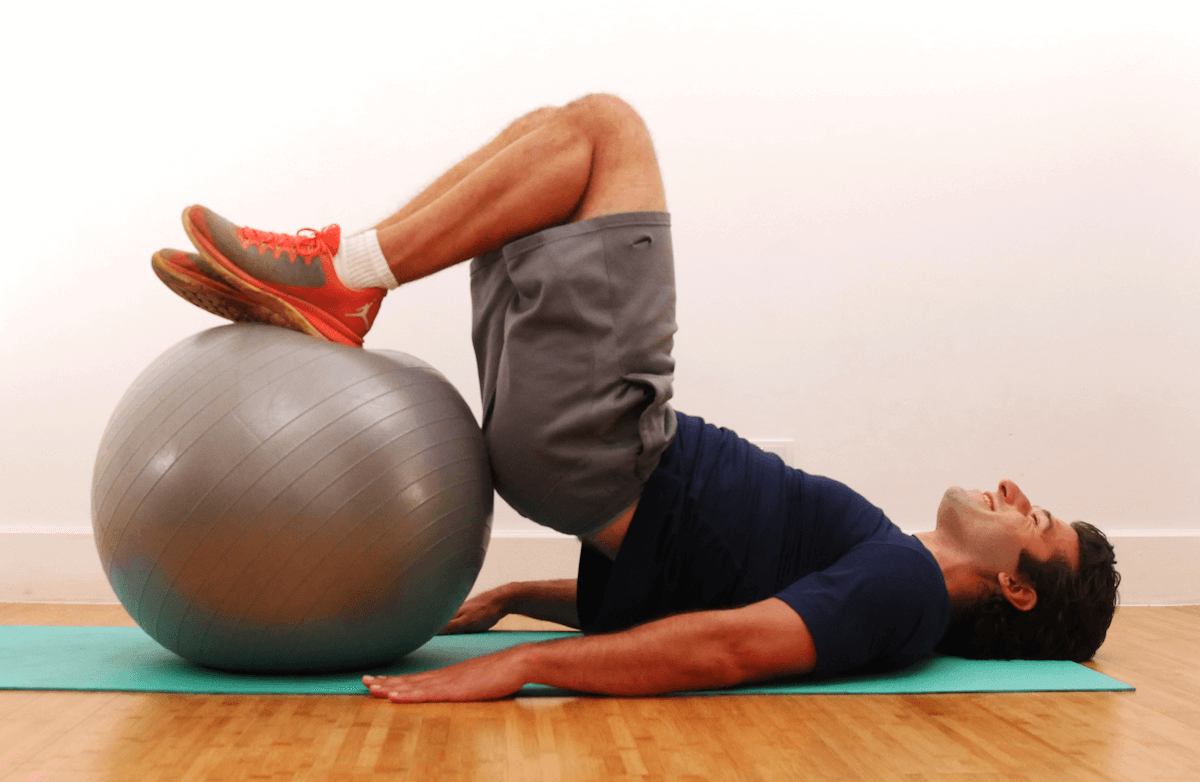 Lie on your back with your lower legs on an exercise ball. Extend your arms to the sides. Squeeze your glutes to raise your hips so your body is straight from shoulders to knees. Pull your heels in so the ball rolls towards your butt. Pause, then roll your heels back out. Drop your butt and hips to the ground, and repeat. Try for five reps to start. The Machine: Calf RaiseYour calves will be worked by almost any leg exercise—squats, lunges, jumps, split squats and the like—you do while standing, Wunsch says. If you’re looking for that extra calf burn and pop you get from the machine, though, he suggests performing a lunge with the heel up. Your form is key. "Make sure the tibia [shin] stays very vertical," he says. Making sure your knee doesn’t come forward past your toes can keep it safe from discomfort and potential injury. The Equipment-Free Exercise: Heels-Up Lunge 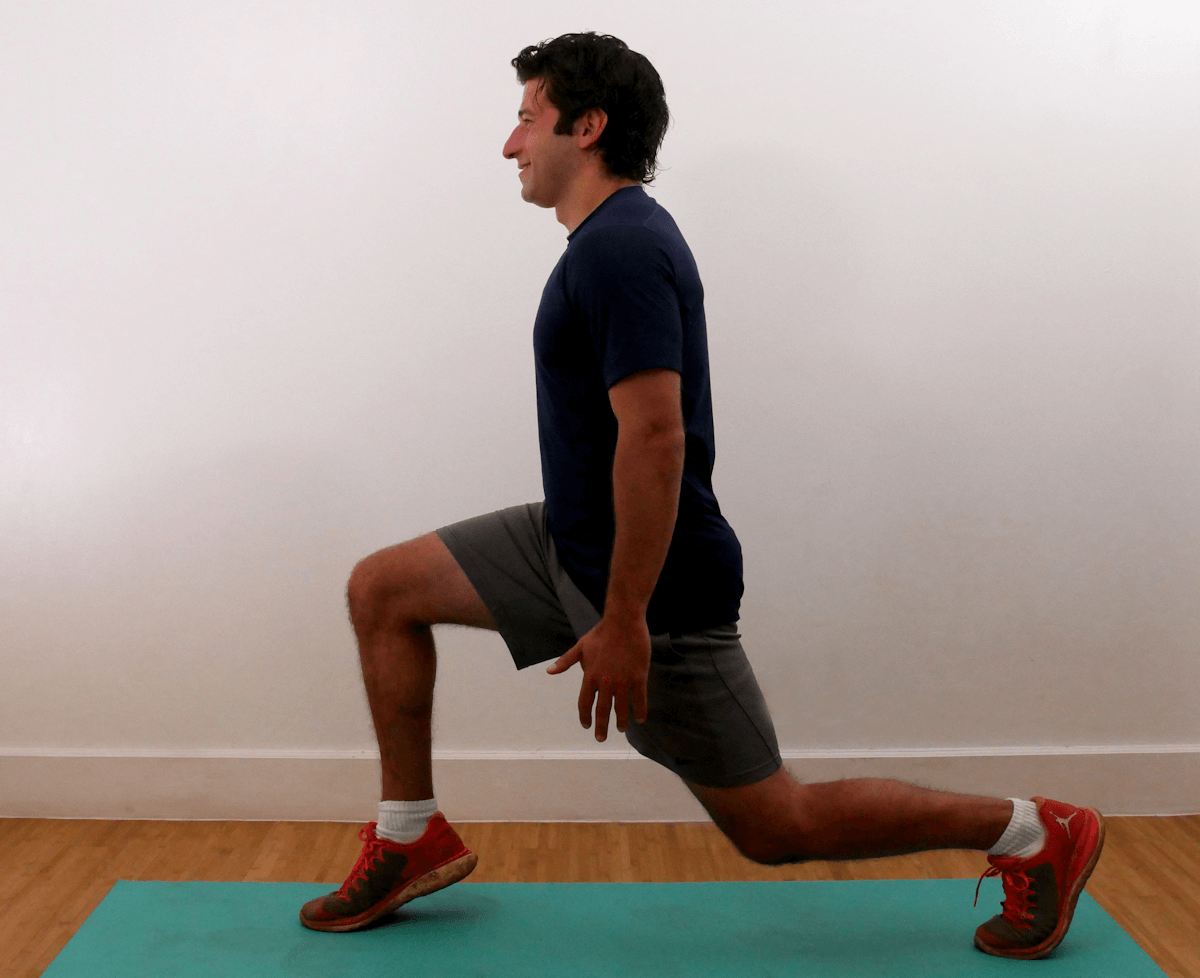 Stand with your feet shoulder-width apart. Take a large lunge step forward with your right leg, descending as you step until both knees The Machine: Seated Triceps Dip Unlike a bodyweight dip, this machine takes your Instead, Wunsch recommends using the The Equipment-Free Exercise 1: Elevated Diamond Pushup  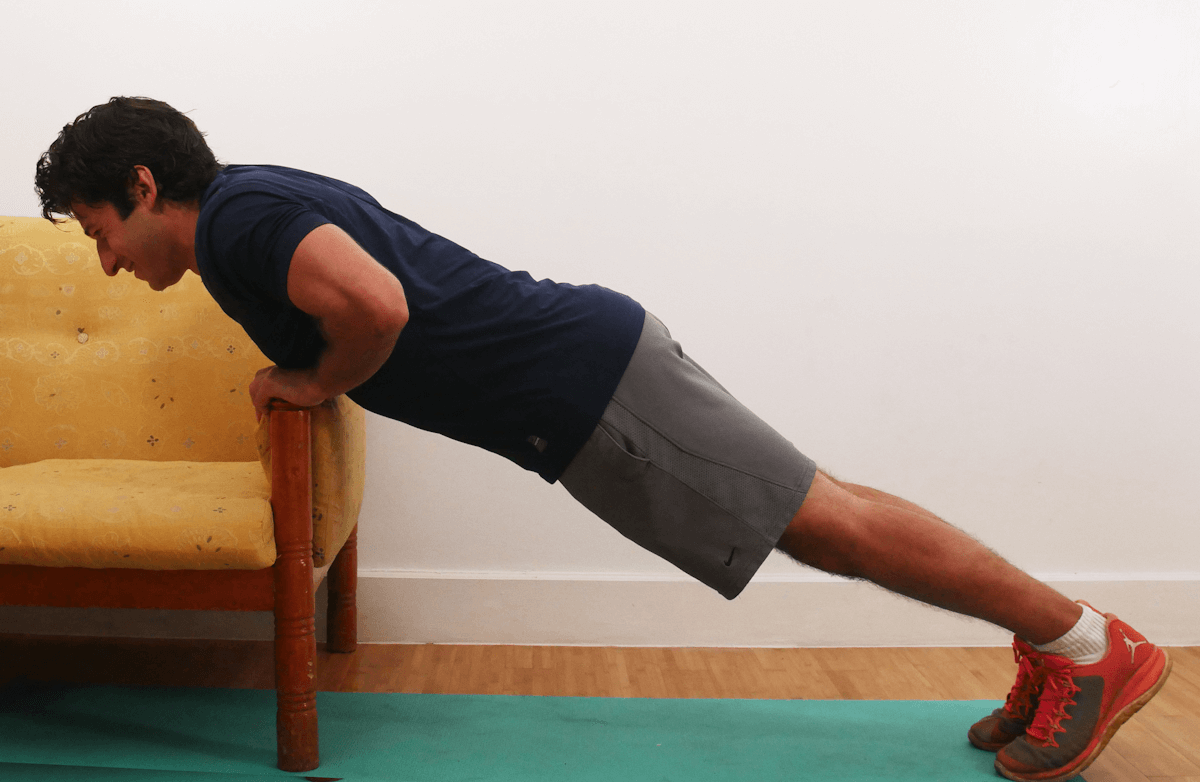 Place your hands close together on the arm of a sofa with your index fingers and thumbs touching. The space between your hands should form a diamond shape. In this position, assume a straight body line from head to heels. Bend your elbows to lower your body until your chest reaches your hands, maintaining the rigid body line throughout the movement. Press back to start, maintaining the body line. Try for five reps to start. The Equipment-Free Exercise 2: Reverse Lat Dip 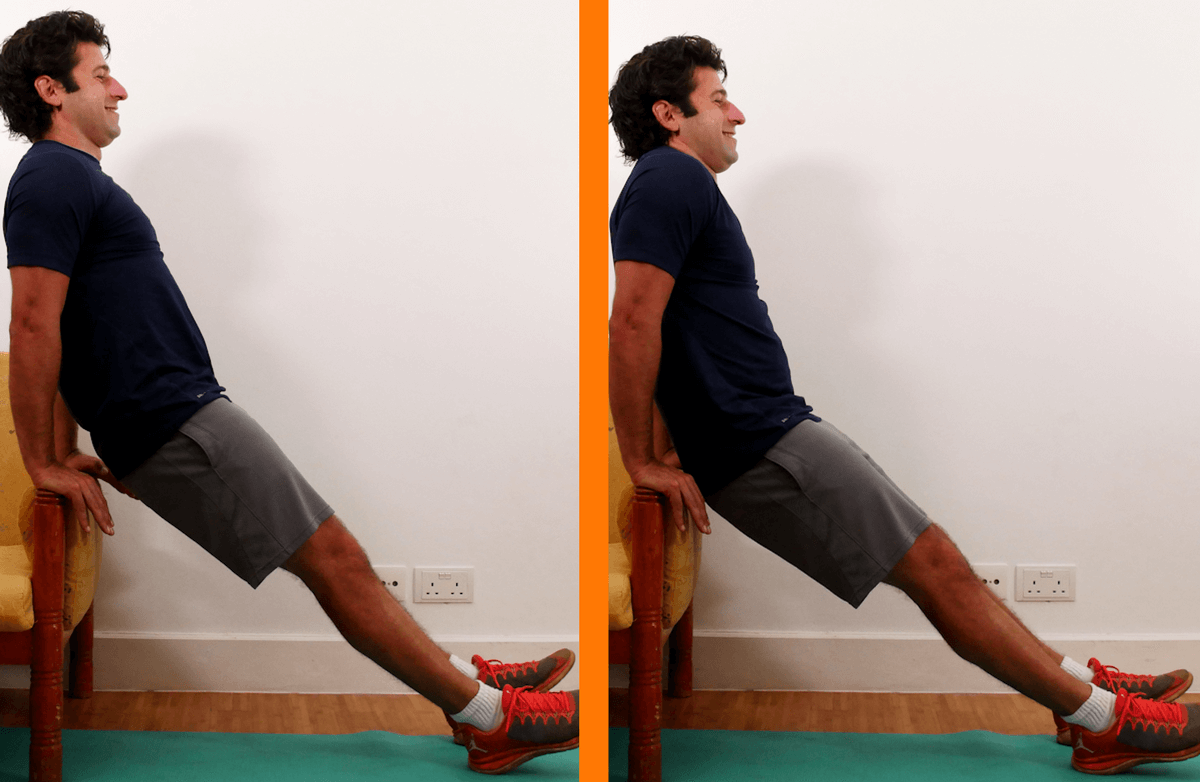 Place your hands behind you on the arm of a sofa, with your shoulders directly above your hands. Tuck your shoulder blades down and back, as if you were trying to tuck them into the back pocket of a pair of jeans. Keeping your arms straight and triceps flexed, allow your shoulders to come straight up towards your ears as your torso drops down slightly. Use your If this is too difficult, bend your knees and bring your feet closer to your butt, but do the rest of the movement as shown. Try for sets of five reps to start. The Machine: Lat PulldownThis is a great exercise to target that back muscle, but without equipment, vertical pulling is difficult to replicate at home, Wunsch says. If you can get your hands on a resistance band, the exercise can be done with the band affixed to the top of a door. For an additional alternative that works your back from a different angle, Wunsch suggests a bent-over band pull-apart. The move will help you train bringing your shoulder blades together—an important function when doing lat pulls. As you do the exercise, "imagine squeezing a pencil between your shoulder blades," he says. This movement—called scapular retraction—is important for keeping your shoulders in a healthy position. Minimal-Equipment Move: Bent-Over Band Pull-Apart  Stand holding the band loose in your hands with feet hip-width apart, knees slightly bent. Push your hips back like you’re opening a door behind you with your backside. This starts the hip hinge. Keep pushing your hips back so that your back remains flat until it is nearly parallel to the floor. Maintaining this flat back position, pull the band apart to the sides so that your upper body forms a "T" shape. Return to start and repeat. Start with just a few reps so you can maintain the flat back posture. Work your way up to sets of five. The Machine: Leg PressFor some people, the leg press seems like a safer option than a squat—and it can be, says "If you have low back issues, it’s more back stabilizing than a squat," he says. Thanks to shoulder impingement issues, For those who don’t feel comfortable with the movement, though, squats aren't the only option at-home option for replacing this machine. Without resistance, leg exercises can get too easy, The Equipment-Free Exercise: Rear-Foot Elevated Split Squat Place one foot behind you on the first or second step of a staircase, with your other foot in front so you’re in a position similar to a lunge. Keeping your torso upright, push your hips back and bend your front knee to descend into a split squat—your torso should be upright, and your front knee should be bent 90 degrees so that your shin is perpendicular to the floor. Press through your front heel to return to the starting position. As the exercise gets easier, move your foot up another step. Start with three reps on each leg, going for three sets total. The Machine: Torso TwistThis is another machine that may not do what its users really want. Despite its appearance, it doesn’t train your core’s rotation in the way it really works, and it won’t make your oblique muscles smaller and tighter—in fact, it does just the opposite. "If you add a lot of weight to your obliques, they grow," He says the twisting also isn’t done the way your To get this rotation effect, Minimal-Equipment Move: Side Medicine Ball Wall Throw Stand |


